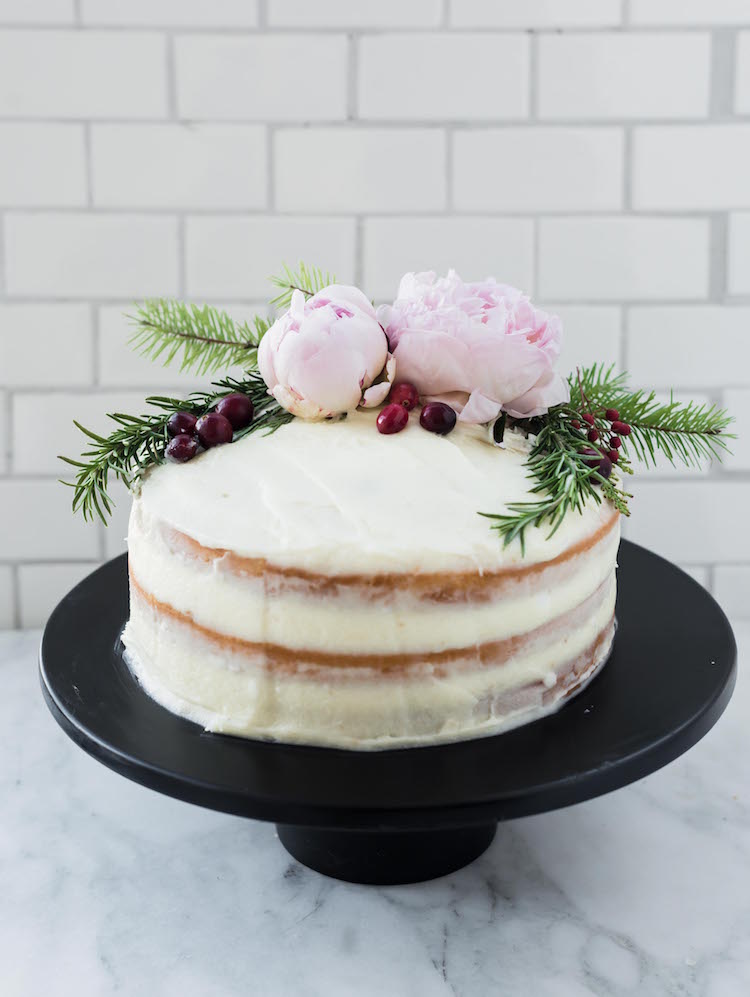
 Naked cakes are an easy, almost fool proof (i.e. me proof) style of cake, but hey look very chic and like you spent hours and hours slaving over the cake. I love the addition of fresh blooms and holiday greenery for this DIY Holiday Naked Cake as well as cranberries and rosemary that adds a perfect, wintery touch. I found some pale pink peonies that were the perfect size for the cake, not too big or too small, and greenery from Whole Foods believe it or not! There is a layer of parchment paper between the cake and florals so not worries that they are not from an organic distributer. You can add what ever garnishes on top that your heart desires, but these are what I chose for my cake. Now, here’s how to make the perfect, easy DIY Holiday Naked Cake!
DIY Holiday Naked Cake
- Yield: 12 1x
Description
This Naked Cake tutorial with flowers and fruit is a beautiful way to serve up a dessert for the holidays and beyond.
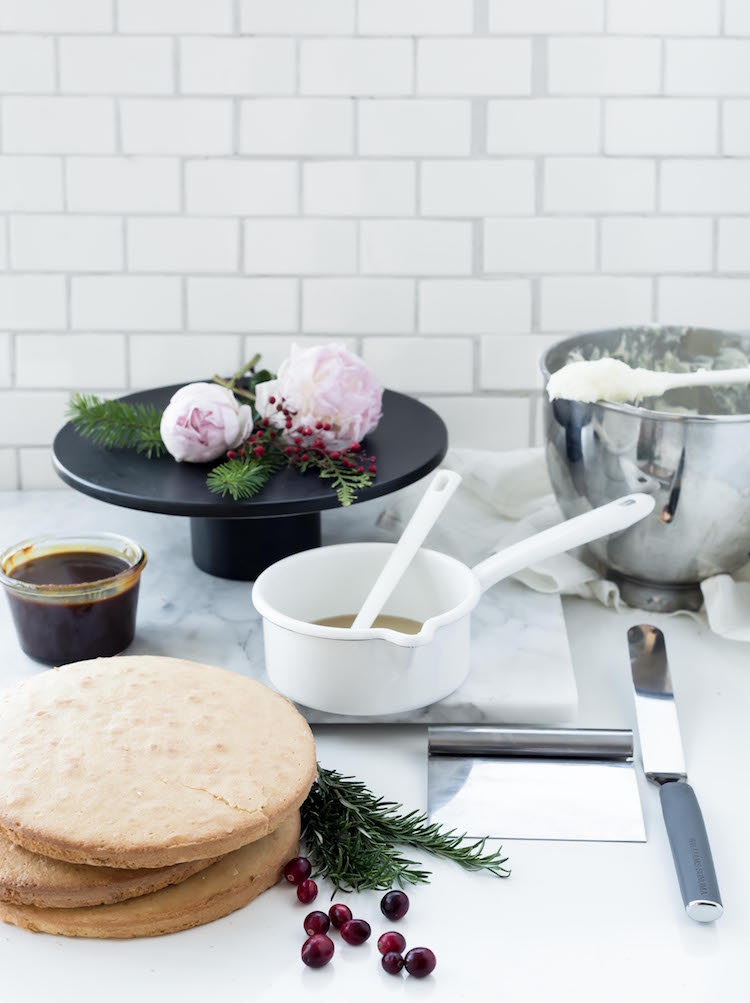
Ingredients
- 1 layer cake, I used coconut cake
- 1 batch of frosting, I used coconut cream cheese
- any other fillings such as rum salted caramel and coconut flakes
- 1/2 cup simple syrup for brushing
TOOLS
- pastry brush
- cake plate or flat plate
- offset spatula
- pastry scraper/chopper
- spoon
- parchment paper
- garnishes such as evergreen stems, rosemary sprigs, flowers, cranberries & 2 tablespoons flaked coconut
Instructions
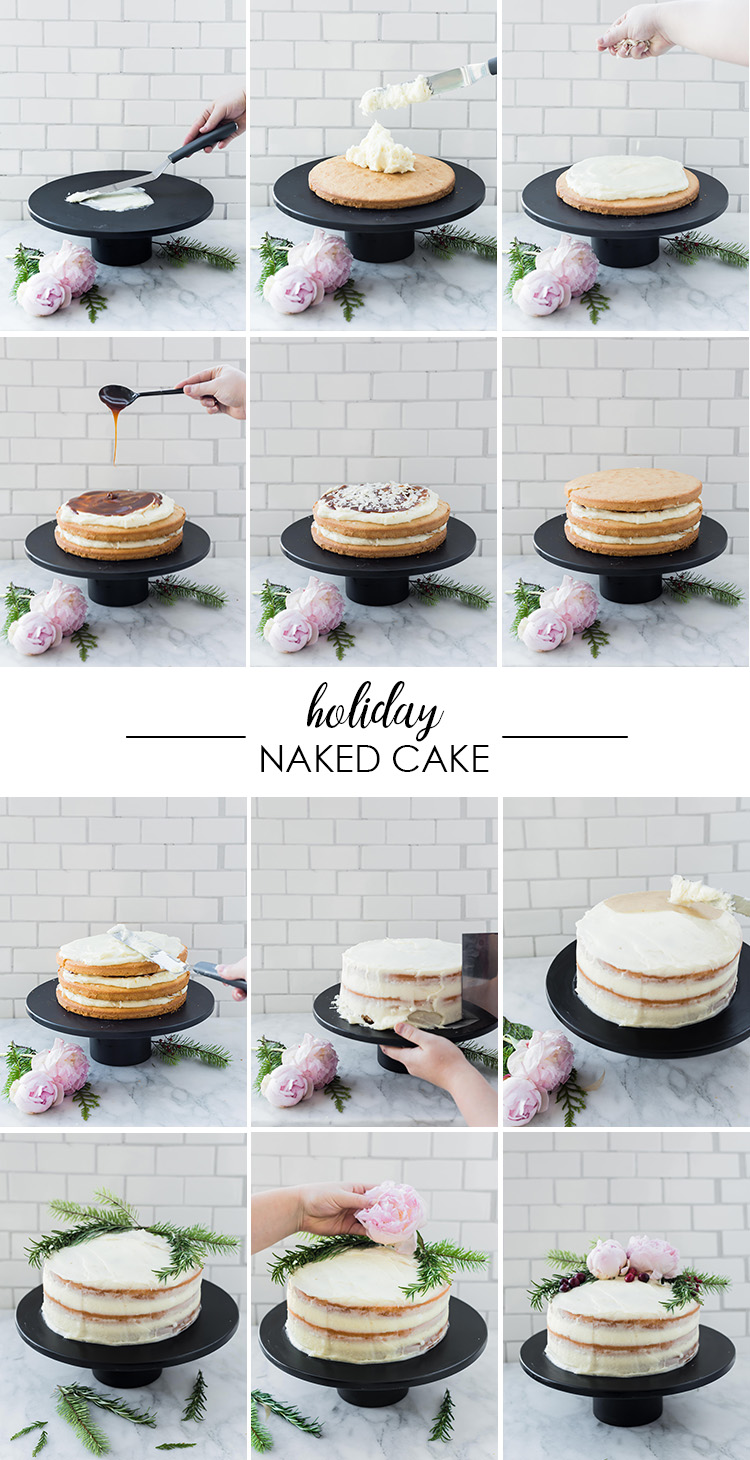
- Make sure to start with cold, chilled cake and room temperature frosting. Add 1-2 tablespoons of frosting to a cake plate and spread a bit. This will keep the cake from slipping around. Place first layer on the frosting and press to make it stick.
- Brush simple syrup on the cake layer to keep it moist.
- Add about 1 -1 1/2 cups frosting at once to the center of the cake, it will help the crumbs from getting into the mix if there is a lot of frosting between the spatula and cake from the start. Spread out in an even layer until about 1/2 inch from the edge of the cake.
- Optional, dollop a few tablespoons of filling like the rum salted caramel into the center. Spread out until 1/4 inch away from the frosting to help keep it from dripping over the cake edge.
- Sprinkle coconut chips on the layer.
- Add the next cake layer and repeat steps 2-5.
- Add the top layer of cake. Dollop 1- 1/2 cups frosting on the top in the center. Spread evenly over the cake.
- Add frosting a bit at a time along the sides of the cake. Turn the plate as you go to evenly distribute the frosting. Take the scrapper and hold along the cake edge. Spin the cake plate and scrap to remove some of the frosting from the side of the cake to get the “naked” look. You’ll want to apply medium pressure and sometimes harder to reveal more of the cake layers in certain spots.
- Using the offset spatula, spread any extra frosting from the top edges inward towards the middle of the cake, spread evenly back and forth.
- Cut a piece of parchment to the size of your garnish on the cake. Spread more frosting over the parchment and smooth out to conceal it. This prevents any florals from actually touching the cake and lifts easily when you need to remove them for slicing.
- Take a damp paper cloth or paper towel and clean up any frosting from the cake plate.
- Arrange the garnish on top. I chose hues of red, pink and green so peonies, evergreens rosemary, cranberries, and coconut flakes. I added the greens and rosemary down first as a base, focusing on one corner of the cake and spreading out from there. Next I added the peonies. I then sprinkled cranberries and coconut flakes along the edges of the greenery.

No Comments